
There is a good reason why Gua Sha, the Chinese scraping massage, has been used for more than 2000 years - it works. So why shouldn't it also be used to treat sagging cheeks? Now that this series in the Part 1 and Part 2 with facial yoga for more beautiful facial contours, I will talk about Gua Sha in part 3.
Gua Sha is a form of massage that reaches deep layers of the muscles and connective tissue (I have already this article about Gua Sha). It enables us to create impulses at a depth that hardly any other manual massage can achieve. This makes it possible to release deep-seated tension in the back and muscles, but also to remove toxins directly from the tissue via the skin. To do this, the scraper is pulled with considerable force on the oiled skin.
Gua Sha on the face
Of course, not quite as much force is needed on the face. In the face, the pressure is adapted to our needs: if we are working on the lymphatic system to remove any congestion and swelling, gentle pressure is sufficient. If we want to stimulate the facial muscles and stimulate the connective tissue, the pressure can be a little higher.

Gua Sha against sagging cheeks
And yes, in our case we want to apply a slightly higher pressure. This is because we want to stimulate our muscles in the area of the sagging cheeks and we want the tissue to produce more elastin and collagen again. You can therefore scrape as hard as you feel comfortable.
Which scrapers are suitable here
Those of you who my book or my Online course (where you learn how to scrape the whole face, as well as cupping and facial yoga), probably already have these scrapers at home. If you want to get one, just click on the picture below. However, a Chinese porcelain spoon or the lid of a Hipp jar or a narrow jam jar will also suffice for massaging the hanging cheeks.

Massage with video
We now want to scrape the area of the face that sags so unsightly over time, causes sagging cheeks and makes our facial contours disappear. I will describe the procedure here and add some important acupressure points that help to give the cheeks more support. At the bottom, as with the other two parts, you will find the link to the corresponding YouTube video that I created to clearly demonstrate the massage.
Suitable for beginners & advanced users
The same applies here as for the other two parts of this series - those of you who already use the "Chi instead of Botox" methods will supplement your usual scraping programme with this massage. Readers who are not familiar with the methods can simply apply this massage as described here and still benefit from it. If you would still like to take a closer look at the "Chi instead of Botox" methods, take a look at this YouTube video: "Chi instead of Botox - reduce wrinkles, tighten your face on your own"
This is how you proceed:
We always scrape on cleansed skin. As it needs some rest after the massage in order to be able to utilise the impulses well, it is highly recommended to scrape in the evening. Oil the area of skin from the chin to the top of the ear. Use a good oil as it will reach deeper layers of your skin and you don't want to rub pesticides in there - so preferably an organic quality oil.
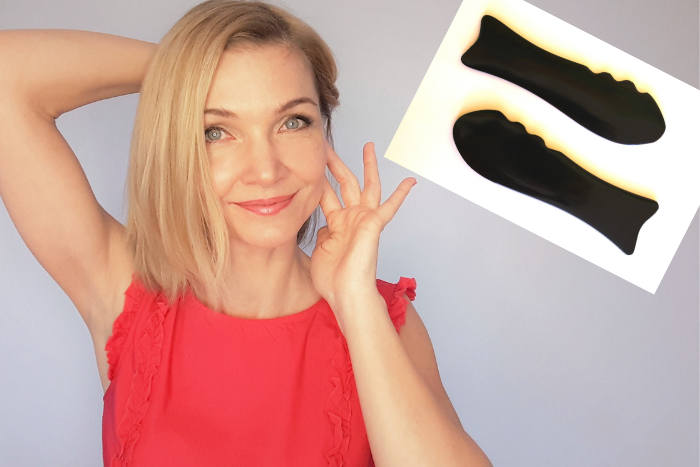
1st step for owners of fish scrapers:

If you have the fish scraper, proceed as follows: place both scrapers with the tail part on the chin (you place your chin in the curve of the tail) and pull them directly along the contour of the face sideways towards the ears. The fish part has two ends. Try to stop the upper end at the point below your cheekbone, in the hollow next to where your upper jaw meets your lower jaw.
Now clench your teeth. Place the lower end of the fishtail where a mound forms when you clench your teeth. Now relax your jaw and massage these two points with the two ends of the fishtail.

Step 1 for porcelain spoon/jar lid users
When massaging with the porcelain spoon or glass lid, first draw a path directly along the contour of the face from the centre of the chin to the ear on one side. Do the same on the other side. Repeat this a few times until the skin is clearly reddened. Then use your fingers to massage the two points that I describe in the paragraph for fish scraper users and for which you have more photos here. Repeat on the other side of the face.


When the jawbone grinds...
When massaging the jawbone, you will probably feel it crunch. These are adhesions caused by too much tension in this area. I have already written about these tensions in the Part 1 of the series.
Step 2
Now massage from the centre of the chin to the ear using either the scraper or the spoon/lid. Repeat this a few times until the skin feels warm and is visibly moisturised. Always make sure you have enough oil and do not rub on the unoiled skin surface. More oil is better than too little.
Step 3
Next, massage in a circular motion from the centre of the chin up to the top of the ear. Repeat a few times.
Step 4 - massage next to the nose
Now scrape the area above the wing of the nose to the right and left of the nose. This is not just about an acupressure point, but rather about massaging the entire area.

Step 5 - final points
At the end of the massage, we will focus on two important acupressure points. One is right next to the corners of the mouth. The other is also not that difficult to find. Draw a line that points straight down next to the outer end of your eye. Where it meets the cheekbone, massage the point directly below this point, below the cheekbone.


He who repeats, learns
It's not as complicated as it always sounds at first glance. You do it two or three times with instructions and then you know it by heart. The nice thing about it is that you can stimulate the points at any time during the day.
Important to know
This massage has the wonderful side effect of relaxing the jaw. You can only relax your neck if your jaw is relaxed. Incidentally, you can continue the scraping massage there. Increase the pressure and massage the neck at the same time.
Why this is important for the neck AND the face
The scraping makes the tissue there softer, warmer and more relaxed. When you're ready, stretch your neck by tilting your head to the sides and forwards. The more stretched your neck muscles are, the better your face will look. Because if everything there is tense and therefore shortened, it pulls on the facial muscles and pulls your facial muscles downwards. And we definitely don't want that! So if you've already got the scraper in your hand, use it on your neck too - your face will thank you for it!
Massage video
You can find the video for this massage here so that you can make sure you're doing everything right. Enjoy the massage and feel good!
Part 1: Get rid of sagging cheeks, define the chin line with facial yoga
Video to part 1
Part 2: Facial yoga against sagging cheeks
Video for part 2
Hello Christina,
I left a comment on another of your blogs almost three weeks ago, shortly after I "discovered" you.
So, when I do the exercise to strengthen the temple muscle, I already notice a micro-movement of the ears; it's definitely not a "twitch" yet, but good things come to those who wait 🙂
I now also have your book, I do the facial yoga exercises diligently and I cupping and scraping. In fact, my face looks completely different in the morning; my skin is smoother and fresher even after sleeping. Fine lines develop into lines, wrinkles into fine lines. I'm just amazed... Even my declared enemy, the nasobial folds, are losing depth. I used to maltreat them every day with the cupping machine, but now I leave them alone for at least a day, usually two. I generally get on well with the instructions in your book, but I'm still going to treat myself to your online course soon; it's quite different when someone shows you how to do something that you can copy. Even if your tutorials on YouTube make it possible, I would like to have something "in one piece" 🙂 Question: Have you ever thought about having your book translated into English (at least)? I have some friends in English-speaking countries and Israel who would certainly be very interested. Many greetings from sunny Frankfurt/M, Andrea
Dear Andrea,
Thank you for your report, I'm delighted! 🙂 I'm pleased that you're achieving good results and that you're enjoying the whole thing - at least I think so, because your lines are bursting with energy.
My publisher has already thought about the translation, but the corona crisis has taken the wind out of our sails. But the idea is there and when everything has calmed down, it will hopefully be realised. Best wishes to Frankfurt and stay tuned, it's worth it! 🙂 LG Christina
PS: A "twitch" is already great when it comes to this muscle. Congratulations 😉
Dear Christina,
I am currently ordering the BellaBambi set (your video has convinced me) and the 1 cm cupping glass from your shop.
I am currently trying to find scrapers made of natural stone.
However, the fish shape only seems to be available without notches. But these are relevant, aren't they?
Are the wooden scrapers also recommended? I would be delighted to hear your feedback.
Best regards
Diana
Dear Diana,
I find the stone scrapers impractical. They are smaller than those made of horn, slip out of your hand easily and chill. Wooden scrapers are fine.
Kind regards,
Christina
Thank you very much for the quick response. Great!
Best regards
Dear Christina,
I've been doing facial yoga for almost two months now and cupping and scraping are firmly integrated into my daily routine, just like brushing my teeth. Of course, I now also have the online video. One of my best and longest-standing friends (we've known each other since we were 10, so for almost 50 years) started your programme shortly after me; we regularly share our progress and have a lot of fun doing it 🙂
The progress is truly amazing! I do the exercises for my forehead and my "enemy", the nasobial folds, at least twice, sometimes three times a day until my muscles groan. The great changes that were visible immediately after cupping/scraping unfortunately disappeared quite soon afterwards, which was quite frustrating. However, I was sure that it was only a matter of time before the pleasing changes remained and that I just had to keep at it. "As a shooter, I wasn't born with patience and I had to learn it the hard way. When something is important to me, it now works very well.
Just as wrinkles appear, virtually "overnight", they also disappear again. My goal is to turn my wrinkles into fine lines and the fine lines into lines. About my nasobial folds. The depth of the wrinkles decreases from bottom to top. The fact that this happens faster on the left side of my face than on the right is inexplicable to me. As mentioned above, the "lifting effect" disappeared fairly quickly after cupping. Then one morning I suddenly realised that the wrinkles had remained consistently flatter. You can imagine my inner cry of joy 🙂 My chin also became firmer, even though it wasn't really a "problem area".
As you can see, things are progressing and I'll be sending you my "before and after" photos over the summer 🙂 Best wishes from sunny Frankfurt, Andrea
Dear Andrea,
Thank you for your feedback! ?
I am very happy for you and with you and I am very grateful that you are sharing your experiences here - because the trick is not to learn these methods, which can be done relatively quickly. The trick is to stick with it long enough and for that you need motivation. I find your post here extremely motivating and it certainly helps others to pick themselves up and stick with it. It's just as you say, the short-term effects are nice, but the long-term effect is really great if you stick with it and work regularly. You can be proud of your perseverance and discipline and you have really earned your "new face"! ??
Keep up the good work! Best wishes from Austria,
Christina
Hello dear Andrea
I am very happy for you. I became aware of your feedback via Instagram. I am curious. What exercises do you use to combat nasolabial folds and sagging cheeks?
I would be very pleased to receive an answer.
Kind regards
Dear Ebru,
Thank you for your kind words 🙂 As I assume that you have the book, I'll give you the exercises that I do. However, it is very important that you train the forehead muscles intensively, as they hold all the "rest". To do this, I do exercises 1 and 2 on pages 88/89 at least twice a day.
Neck/chin: p.75 exercise 2; p.76 exercise 4 (this is very intensive!); p.78 exercise 7
Mouth/lips/cheeks: This exercise against nasolabial folds is VERY intensive and trains the cheek muscles, chin and neck at the same time. I do this exercise three times a day and then the muscles beg for mercy! P. 81, exercise 6; p.82 exercise 8.
I have now also realised that you have to pay just as much attention to relaxation exercises as facial yoga exercises; what good is a muscle that has gained volume but is clenched into a fist and not relaxed? Nothing, because it can't smooth out the wrinkles. However, I have only really realised this connection in the last few days, as I had only done the relaxation exercises from time to time, even though Christina repeatedly emphasises how important it is to relax the muscles. And you also have to practise this until you can feel the difference between a tense and a relaxed muscle.
I hope I have been able to help you with this.
Best regards from Frankfurt, Andrea
Dear Andrea,
You might like the new programme that I put in the online course yesterday - I deliberately included several massages there to relax the muscles in between 😉.
Best regards,
Christina
Dear Christina,
Oh yes, I like it very much 🙂
Kind regards
Andrea
Dear Andrea,
Thank you for the effort you have made. I've been taking a break for the last few weeks.
I would really like to get going again. I'll take your tips to heart.
I wish you a wonderful summer.
Best wishes from the beautiful Rhineland,
Ebru
Dear Christina
I find the massages in your videos very exciting and have also enjoyed reading your book.
Unfortunately, I have couperose, i.e. red veins, and I am not sure whether I can use the massages with the cupping glasses or scrapers for this problem.
What do you think?
I don't want any more of the red veins 😉
Best regards!
Katrin
Dear Katrin,
With couperose, you need to be careful with cupping. Basically, these massages are good because they have a decongestant effect, i.e. they ensure that no pressure is exerted on the veins to the extent that they burst. It is important to include the décolleté - from the centre outwards to the armpits. Also the neck - from top to bottom. Simply avoid the neck and then the areas of the face where the veins are. Personally, I've been cupping over them for 10 years and haven't got a single extra vein, although they used to burst all the time. I also have TCM beauticians in my courses who also cupping over them without fear and have had good experiences. However, I still can't recommend it to you. Scraping is not a problem, so avoid these areas when cupping.
Best regards,
Christina
Hello Christina,
I ordered your book, the two scrapers and a few other things from your shop. But now I couldn't wait any longer and have also signed up for the online course 😉.
In the video, you show this circular motion with just one scraper. Can I also use this for scraping the whole face (according to the video in the online course) until I have my two scrapers (I only have a square scraper made of horn so far), or would you not recommend this?
Dear Claudia,
I don't know exactly which circular movement you mean, but you can do the massage with your scraper as it is written in the course, just massage with a scraper. Make small stroking movements. It will be more intense with two scrapers, but you can start like this if you are impatient ????.
Kind regards,
Christina